Post by Captain America on Sept 30, 2012 15:18:43 GMT -5
Hey guys
well Hal wanted me to show you how I make my polyvores
well just the background and positioning really
here we go
today we are making this one

first and foremost, we'll meet your best friends
tool bar one (this can flip or flop the pictures and make them go in front of or behind others)

tool bar two (this is the zoom button, the save button, and undo button)

tool bar three (this can alter the photograph, for whether you want a background or not. it also gives you the option to make a custom shape for your pictures)

text options (this comes up when you're adding text)

and the options (when you click on the item, it forms a box. in the corners there are little boxes you can pull on to make them bigger or smaller. at the top, there is a circle so you can tilt the picture)

1. first you start off with a blank slate. you know what it looks like
2. then you add the back ground which is this one. you can find it in the background category
to do that, you just put the picture in the top left hand corner and keep pulling down until the bottom of the picture hits the bottom of the window so it looks like this

3. next we add the frame which you can get when you search frame. I personally don't go in the frame and borders category because they only have a limited amount.
it goes on the right side, but not all the way up
now it looks like this

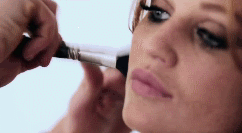
4. the next step is to add this picture, which is found either in the people and print category or when you search for that specific person, into the frame
so it looks like this

5. after that, you add this dress that you can find in the dress category and make it big enough so that it fills like 75% of the open space. like this.

when you do that, you add a jacket, which is this one which is found in the jackets category
you make it bigger and put it behind the dress. the way you do that is by clicking on the item and pressing the backwards button in the tool bar located on the top right hand side. (tool bar 1)
it now looks like this.

6. now you add the shoes and jewelry
the shoes that are found in the shoes category go in the bottom left hand corner. remember to make them bigger
the necklace that s found in the jewelry category goes on the dress as if a girl was wearing them.
the earrings go where the shoes are, but tilted downward a bit
it'll look like this

7. after that's done
you add the make up. which is found in the beauty category, consists of this, this, and this
the perfume needs to be right next to the shoes, over the dress, frame, and background, but behind the earrings.
the palette is next to the perfume, but behind it, while still remaining above everything else. it needs to be tilted a bit to the right.
now the lipgloss is next to the palette, but in front of everything. it needs to be tilted a bit to the left.
it'll look like this

8. now you add the flower which is found when you search "flowers"
this goes in the bottom right hand corner, above everything, but behind the lipgloss.
it now looks like this

9. the 9th and final step is to add the word "Halima"
you go to text and click the one in the first column, 8th one down, it is entitled "Honey Script"
you add it to the center of the dress and tilt it down, to the left.
of course you change the text to say "Halima" using the text options tool bar above.
then you change the color to the pink I use in mine. which is the third shade of pink in the pink column
it'll end up like this
and now, you save it, add a title and what not, and then you're done!
of course, you can change anything about the set. from the background, to the colors and accessories. even the positioning and font.
but that's generally how it works
I hope I helped!
well Hal wanted me to show you how I make my polyvores
well just the background and positioning really
here we go
today we are making this one
first and foremost, we'll meet your best friends
tool bar one (this can flip or flop the pictures and make them go in front of or behind others)
tool bar two (this is the zoom button, the save button, and undo button)
tool bar three (this can alter the photograph, for whether you want a background or not. it also gives you the option to make a custom shape for your pictures)
text options (this comes up when you're adding text)
and the options (when you click on the item, it forms a box. in the corners there are little boxes you can pull on to make them bigger or smaller. at the top, there is a circle so you can tilt the picture)
1. first you start off with a blank slate. you know what it looks like
2. then you add the back ground which is this one. you can find it in the background category
to do that, you just put the picture in the top left hand corner and keep pulling down until the bottom of the picture hits the bottom of the window so it looks like this
3. next we add the frame which you can get when you search frame. I personally don't go in the frame and borders category because they only have a limited amount.
it goes on the right side, but not all the way up
now it looks like this
4. the next step is to add this picture, which is found either in the people and print category or when you search for that specific person, into the frame
so it looks like this
5. after that, you add this dress that you can find in the dress category and make it big enough so that it fills like 75% of the open space. like this.
when you do that, you add a jacket, which is this one which is found in the jackets category
you make it bigger and put it behind the dress. the way you do that is by clicking on the item and pressing the backwards button in the tool bar located on the top right hand side. (tool bar 1)
it now looks like this.
6. now you add the shoes and jewelry
the shoes that are found in the shoes category go in the bottom left hand corner. remember to make them bigger
the necklace that s found in the jewelry category goes on the dress as if a girl was wearing them.
the earrings go where the shoes are, but tilted downward a bit
it'll look like this
7. after that's done
you add the make up. which is found in the beauty category, consists of this, this, and this
the perfume needs to be right next to the shoes, over the dress, frame, and background, but behind the earrings.
the palette is next to the perfume, but behind it, while still remaining above everything else. it needs to be tilted a bit to the right.
now the lipgloss is next to the palette, but in front of everything. it needs to be tilted a bit to the left.
it'll look like this
8. now you add the flower which is found when you search "flowers"
this goes in the bottom right hand corner, above everything, but behind the lipgloss.
it now looks like this
9. the 9th and final step is to add the word "Halima"
you go to text and click the one in the first column, 8th one down, it is entitled "Honey Script"
you add it to the center of the dress and tilt it down, to the left.
of course you change the text to say "Halima" using the text options tool bar above.
then you change the color to the pink I use in mine. which is the third shade of pink in the pink column
it'll end up like this
and now, you save it, add a title and what not, and then you're done!
of course, you can change anything about the set. from the background, to the colors and accessories. even the positioning and font.
but that's generally how it works
I hope I helped!